Chocolate Hazelnut Truffles
Are you ready for a taste of pure luxury that is surprisingly simple to create? This recipe for homemade Chocolate Hazelnut Truffles is everything you’ve been looking for.
They’re rich, decadent, and melt-in-your-mouth amazing, the perfect treat for any occasion, from a casual weeknight indulgence to an elegant holiday dessert. Forget those expensive store-bought versions; these truffles are a game-changer.
This post may contain affiliate links, read our privacy policy.
Why You’ll Adore These Chocolate Hazelnut Truffles
Quick, Easy, and Impressive
You don’t need a pastry degree to master these. With minimal active time and a simple chilling process, you’ll have professional-quality confections. They look sophisticated but require only a handful of common ingredients.
The Perfect Flavor Combination
The deep, roasted flavor of hazelnut perfectly complements the intense richness of chocolate. The optional peanut butter coating adds a salty-sweet counterpoint that makes these truly irresistible.
What You’ll Need (The Ingredients)
You’ll need just a few simple things for the truffles themselves:
- A jar of your favorite chocolate hazelnut spread
- Some high-quality chocolate chips or a chocolate hazelnut bar
- Heavy cream
- A touch of vanilla extract
For the optional peanut butter coating:
- Peanut butter chips
- A little neutral oil -vegetable or coconut oil
Success Tips for the Perfect Truffles
Follow these guidelines for truffle perfection:
- Chilling is Critical: Do not rush the chilling steps. The initial chill for the ganache must be long enough for it to firm up completely so it can be rolled. If it’s too soft, your truffles will be messy.
- Uniform Rolling: Use a small cookie scoop or a measuring spoon to ensure all your truffles are roughly the same size. This helps with consistent freezing and a beautiful presentation.
- Temper the Coating: When melting the peanut butter chips, go slowly. Use a double boiler or microwave in short bursts, stirring in between. Adding the oil helps make the coating smooth and easy to dip.
Ingredient Deep Dive and Substitutions
- Chocolate Hazelnut Spread: This provides the bulk of the flavor and texture. It acts as both the sweetener and the binder. Substitution: If you don’t have hazelnut spread, you can use a pure chocolate ganache and add a tablespoon of hazelnut liqueur or hazelnut extract for flavor.
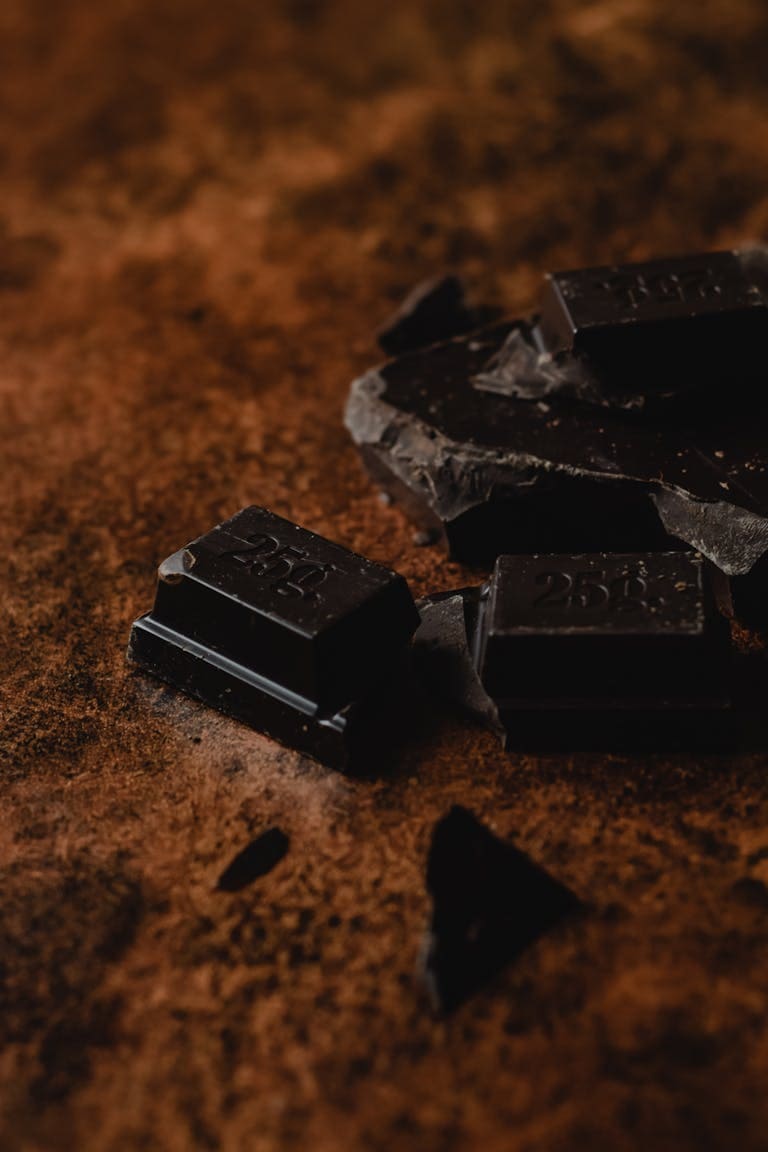
- Chocolate (Chips or Bar): The chocolate adds depth and structure. The higher the quality, the better the final flavor. Substitution: You can use any type of good-quality chocolate: semi-sweet, dark, or milk chocolate. Dark chocolate will create a richer, less sweet truffle.
- Heavy Cream: The fat in the heavy cream emulsifies with the chocolate and spread to create the velvety ganache texture. Substitution: Full-fat coconut cream (the thick part from a chilled can) can be used for a dairy-free option, though it may impart a slight coconut flavor.
- Peanut Butter Chips: These melt easily and provide the flavor for the coating. Substitution: You can use white chocolate chips mixed with a tablespoon of creamy peanut butter for a similar taste.
Variations to Elevate Your Truffles
Get creative with your coatings and additions!
- Classic Chocolate Coating: Skip the peanut butter and coat them in melted dark or milk chocolate.
- Nutty Crunch: Roll the finished truffles in finely chopped toasted hazelnuts, almonds, or pecans before the final set.
- Cocoa Dust: For a minimalist look, roll the chilled balls in high-quality unsweetened cocoa powder.
- Spiced: Add a pinch of cinnamon or a dash of espresso powder to the ganache mixture before chilling for an extra layer of complexity.
- Boozy Truffles: Stir a teaspoon of your favorite liqueur (like Frangelico or rum) into the warm ganache mixture.
Storage Tips
- Refrigerated: Store the finished truffles in an airtight container in the refrigerator for up to two weeks.
- Frozen: For longer storage, freeze them in a single layer on a baking sheet until solid, then transfer them to a freezer-safe, airtight container. They will keep for up to three months. Thaw overnight in the refrigerator before serving.
- Serving: Truffles are best enjoyed slightly chilled but not straight from the freezer. Let them sit at room temperature for about 10 minutes before serving.
FAQ
Why is my ganache too soft to roll?
It likely needs more chilling time. If it still doesn’t firm up after several hours, you may need to add a small amount of extra melted chocolate to the mixture and chill again.
Can I make these dairy-free?
Yes, use a dairy-free chocolate hazelnut spread, high-quality dairy-free chocolate chips, and substitute the heavy cream with the thick part of chilled coconut cream.
How do I get a perfectly smooth coating?
Ensure your truffle balls are frozen solid, and your coating is thin and smooth (the oil helps with this). Dip the truffle quickly and let the excess coating drip off entirely before placing it on parchment paper.
Chocolate Hazelnut Truffles
Ingredients
Equipment
Method
- Heat the Cream: In a small saucepan or microwave-safe bowl, gently heat the heavy cream until it just begins to simmer around the edges. Do not let it boil vigorously.
- Combine Chocolate: Place the chocolate chips or chopped chocolate hazelnut bar into a medium heatproof bowl. Pour the hot heavy cream over the chocolate.
- Create Ganache: Let the mixture sit undisturbed for 5 minutes to allow the heat to melt the chocolate. Add the vanilla extract. Whisk or stir gently with a spatula starting from the center and moving outwards until the mixture is completely smooth and uniform.
- Add Hazelnut Spread: Stir in the chocolate hazelnut spread until fully incorporated. The mixture should be thick and glossy.
- Chill: Cover the bowl and refrigerate for at least 1 -3 hours, or until the mixture is firm enough to easily roll into balls.
- Scoop: Line a baking sheet with parchment paper. Use a small cookie scoop or tablespoon to scoop the firm ganache mixture.
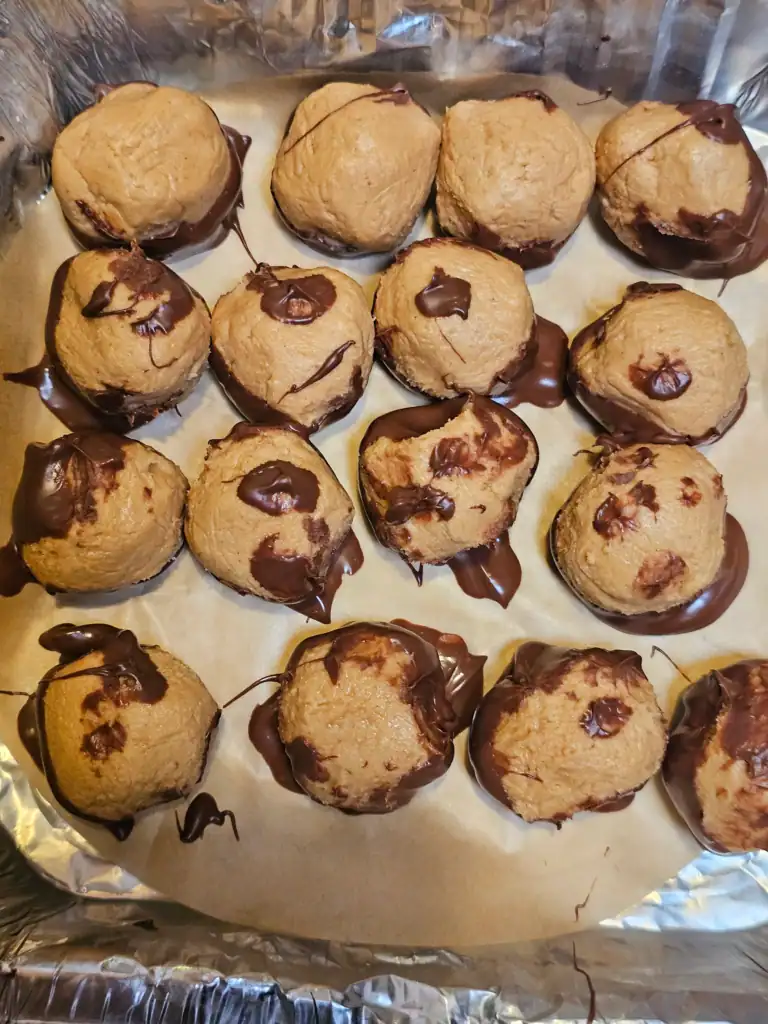
- Roll: Roll the scoops between your palms into uniform 1-inch balls. Place them on the prepared baking sheet.
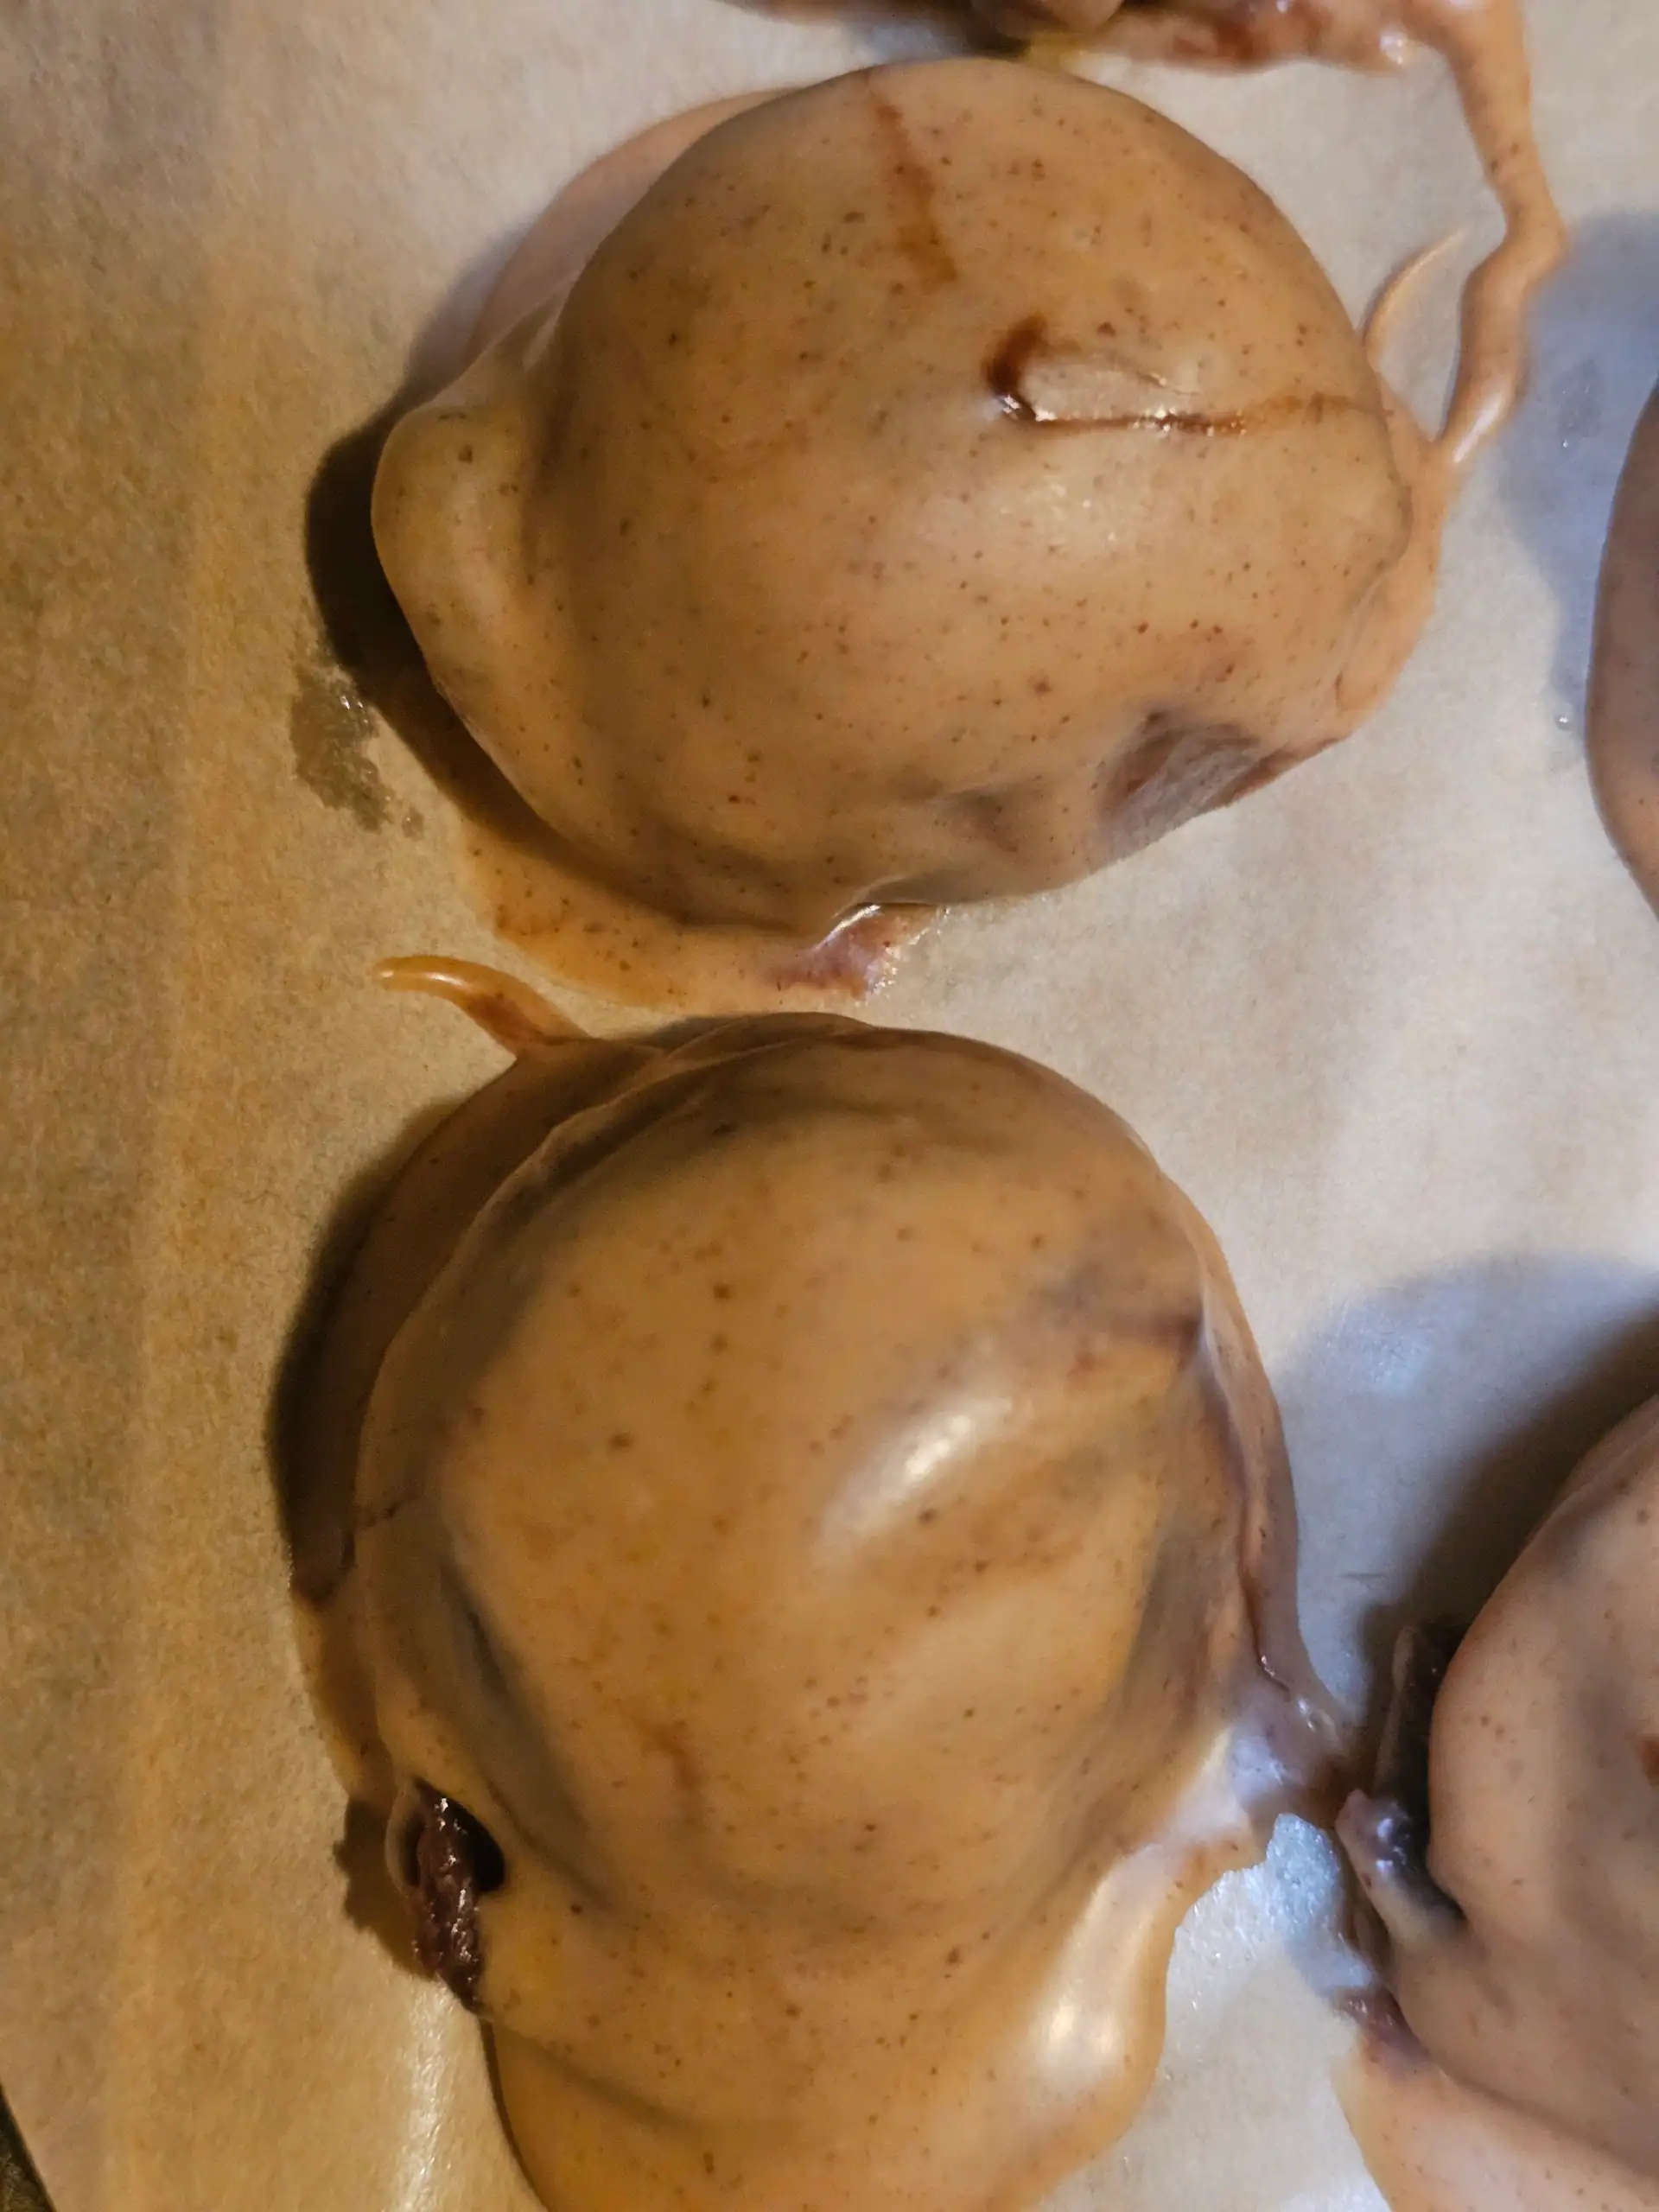
- Freeze: Transfer the baking sheet of truffles to the freezer for 30 minutes. This is crucial for a smooth coating.
- Melt Coating: In a small, deep bowl, melt the peanut butter chips with the oil. Use a double boiler or microwave in 30-second intervals, stirring until completely smooth. The oil helps thin the coating for easier dipping.
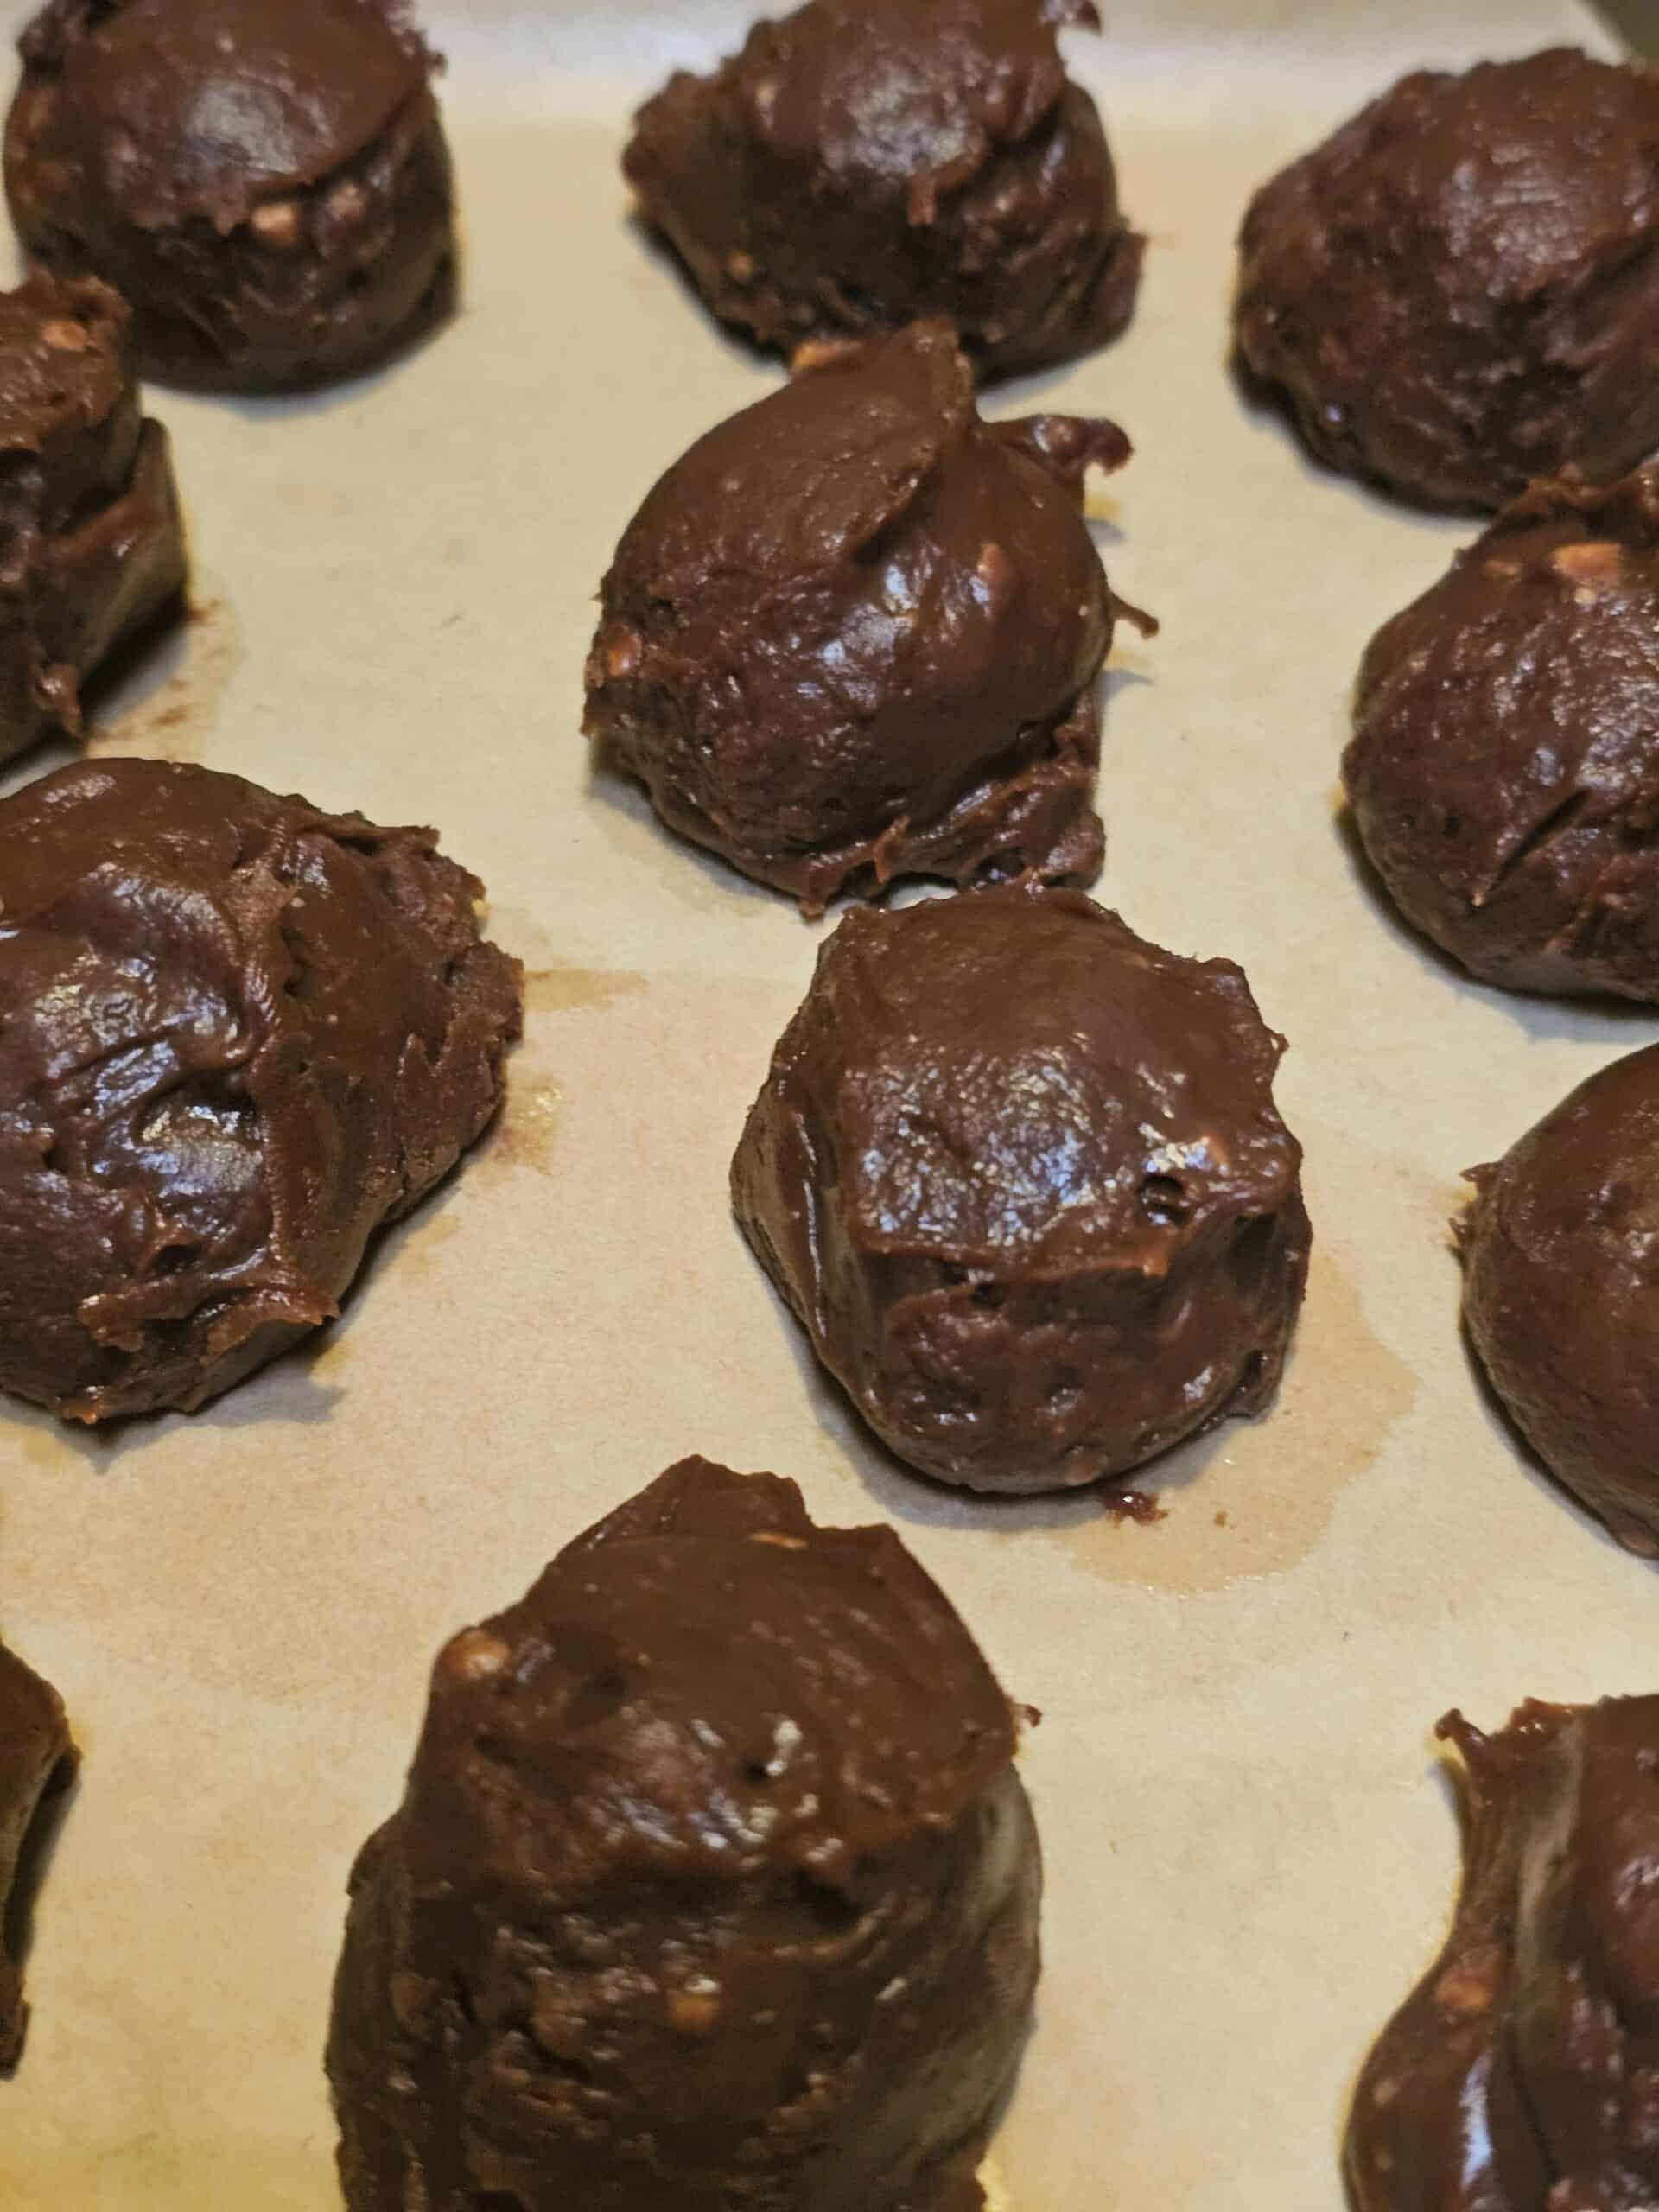
- Dip: Remove the truffles from the freezer. Working quickly, use a fork or a dipping tool to dip each frozen truffle into the peanut butter coating. Tap the fork gently on the side of the bowl to allow excess coating to drip off.
- Set: Place the coated truffles back on the parchment-lined baking sheet. Repeat until all truffles are coated.
- Final Chill: Refrigerate the finished truffles for about 1 hour to allow the coating to fully set before serving.
Notes
You Might Also Like
If you enjoyed these Chocolate Hazelnut Truffles, be sure to try these other decadent recipes: